I know that feeling all too well. You’ve created a beautiful masterpiece of a game, and then you head over to playtest. HOLY COOKIE TECH! You notice that your game is laggier than Frontlines at full graphics. You search everywhere, and can’t find any meaningful tips on game optimization! But, I’m here to change that. I’m compiling a bunch of optimization strategies I’ve picked up over the past few months of trying to optimize a game.
Tip 1 - Reduce Lighting
Some people don’t realize how much of a lag causer lighting can be.
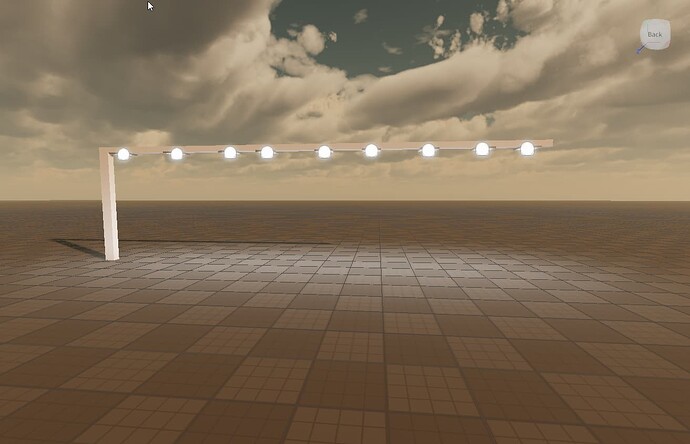
- Open the Lighting Editor plugin.
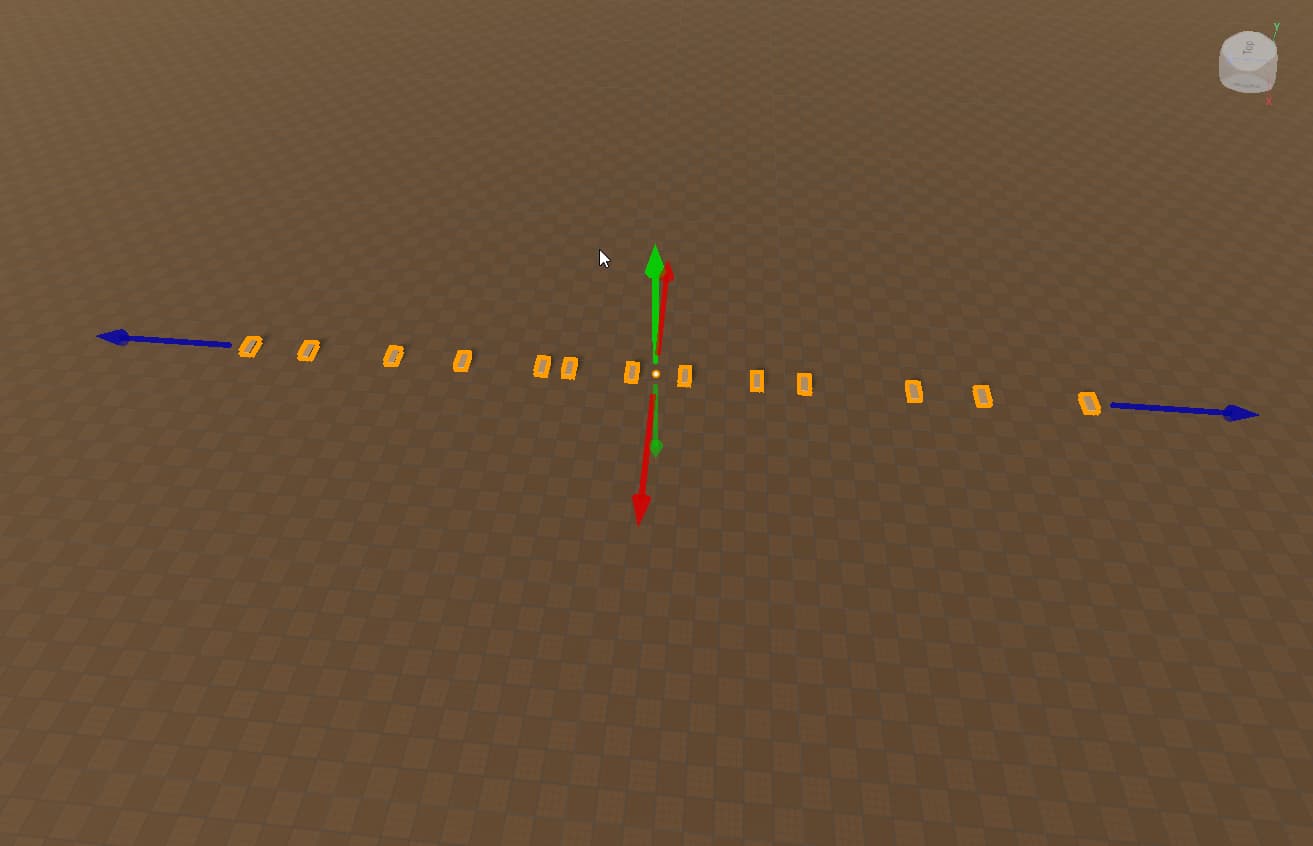
(Each white dot is an enabled lighting source)
Notice how many single lighting sources there are? This can be greatly reduced, easily and quickly.
- Delete all of the lighting sources by clicking on the dots and pressing backspace.
- Create a new part
- Add a surface light
- Resize it over the entirety of the lights and configure the settings in Properties.
Now, there’s only a single light source for all of those lights!
NOTE: I would strongly suggest not using this across things like outdoor street lights due to the fact that it may take away from realism.
Suggested Resources
Tip 2 - Disable Collisions on Non-essential Parts/Meshes
Having too many collisions enabled puts a lot of stress on the game, with it having to render all of those collisions constantly.
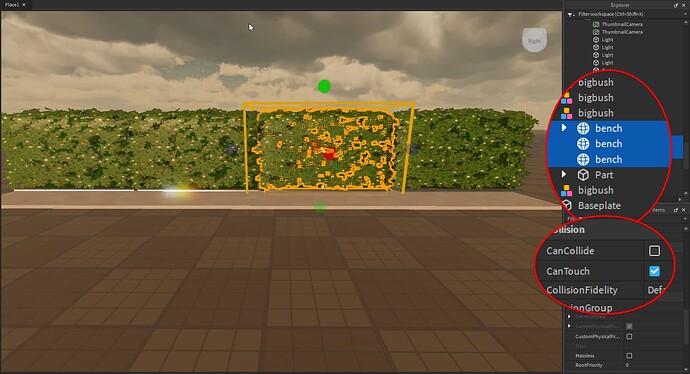
Turning off collisions is easy, simply select what you want to disable collisions on, then disable the CanCollide option in Properties.
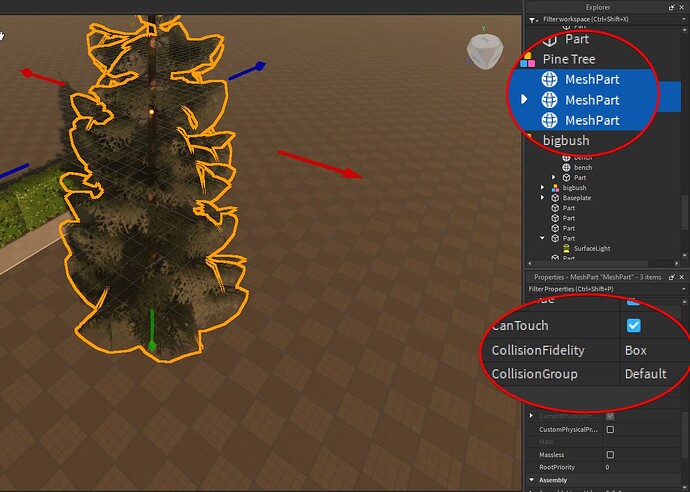
Tip 3 - Enable Performance Rendering/Box Collision Fidelity on Meshes
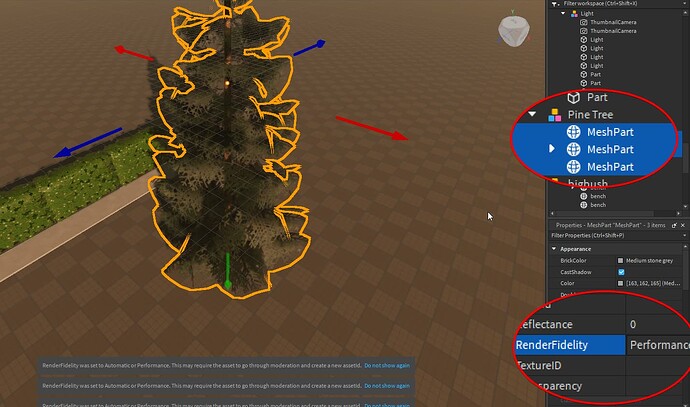
Performance rendering works simply. It reduces the quality of the mesh the farther the player gets from it. Box Collision Fidelity simply reduces the accuracy of the mesh’s collisions.
NOTE: Only disable Box collision fidelity on meshes that don’t need precise collision rendering, things like bushes and trees.
-
Enable Performance Rendering:
-
Enable Box Collision Fidelity:
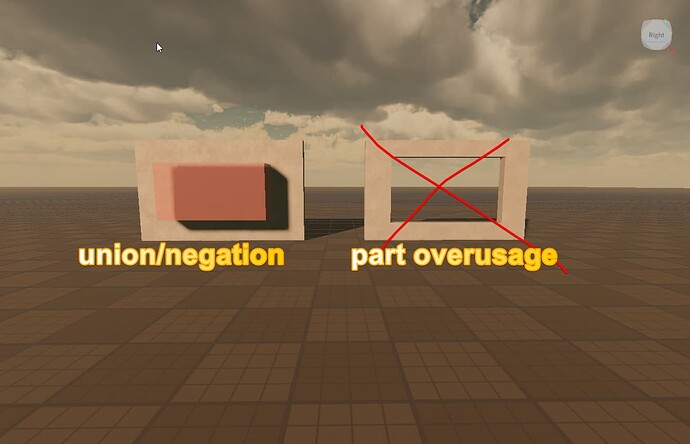
Tip 4 - Reduce Part Count by Using Unions
Using unions is a great way to decrease your part count. Instead of using four parts, I can simply negate a part and unionize it with the wall part.
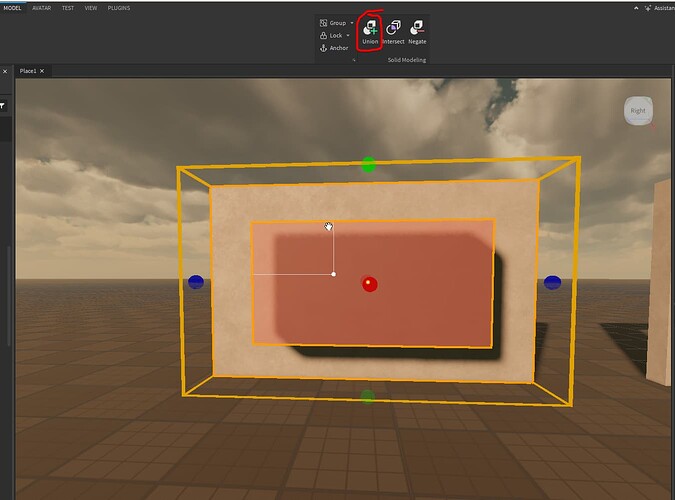
-
Select the negated part and the part you want to create a hole in.
-
Click “Union”
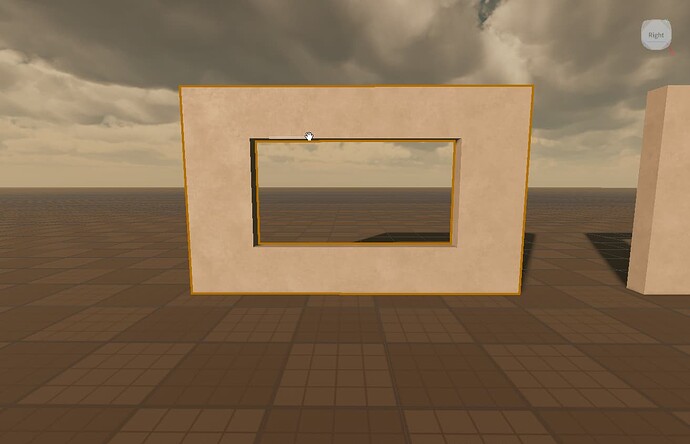
After you’re done, there will be a hole in the part.
PROTIP: Negation turns a part into negative space. Once you unionize it, the negative space and the part become combined.
Tip 5 - Put Instances into Groups
Grouping instances is an imperative step to organization and optimization. Hitting two birds with one stone here!
- Pretty straightforward and easy, just select the ungrouped parts and press CTRL + G (or CMD + G if on a Macaroni device)
Tip 6 - Enable Streaming Enabled
No, not that kind of streaming! The kind that controls how much of the game is loaded for a player at once. Silly pumpkin!
Anyways, let’s get into this one.
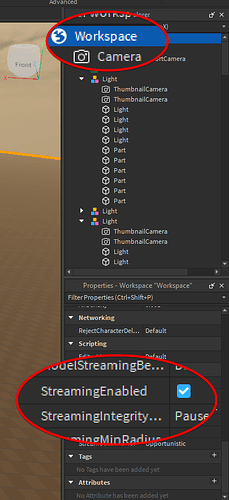
- Select the Workspace and scroll to StreamingEnabled in properties. Enable this.
Thanks for Reading!
I put a good while of time into making the visuals and writing the tips by hand for this, so thanks for appreciating it!
This will be updated periodically, so make sure to leave your optimization tips in the replies to this topic!
Before you Go…
Help me out by choosing one of the options below so I know if this was worth the time it took to make! ![]()
- I found these tips useful.
- These were not helpful for me.
nothing to see here
i have now gotten ur exact location from you clicking teh button!!!1! (rel)
