Welcome! 
In today’s tutorial, we’ll be teaching you how you can use the brand-new TextChatService released by Roblox.
This feature allows you to:
- Enable Text Chat Service

- Configure Chat Window
- Customize Message Appreance
- Add Chat Tags
- Change Colour Of Usernames
I hope you enjoy today’s tutorial, let’s get started!
Enable Text Chat Service
![]() This step is essential to complete everything else on the list.
This step is essential to complete everything else on the list.
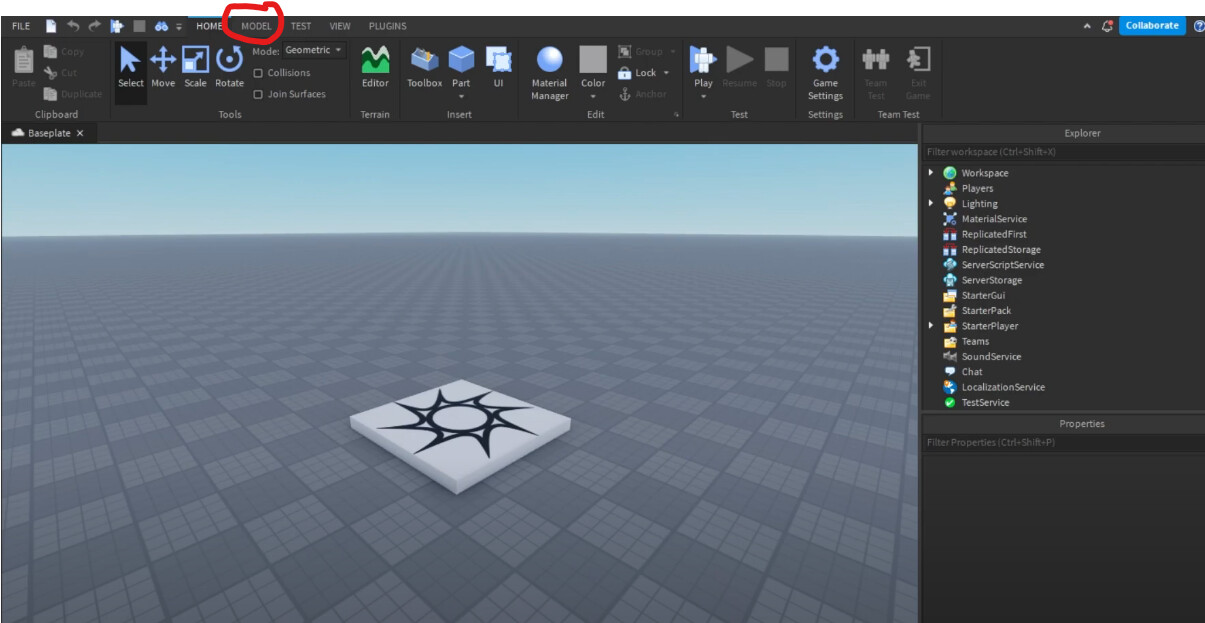
To enable the text chat service, it’s a simple task, first head to Model.
We’ll need to insert the TextChatservice from the advanced section. Once you’re in the Model tab, navigate to the advanced section, then click on service.

On a smaller screen?
If you’re on a smaller screen, the advanced tab may be under a dropdown.

Now we need to insert the service, to go ahead and do this I would recommend sizing up your “Insert Service” frame.
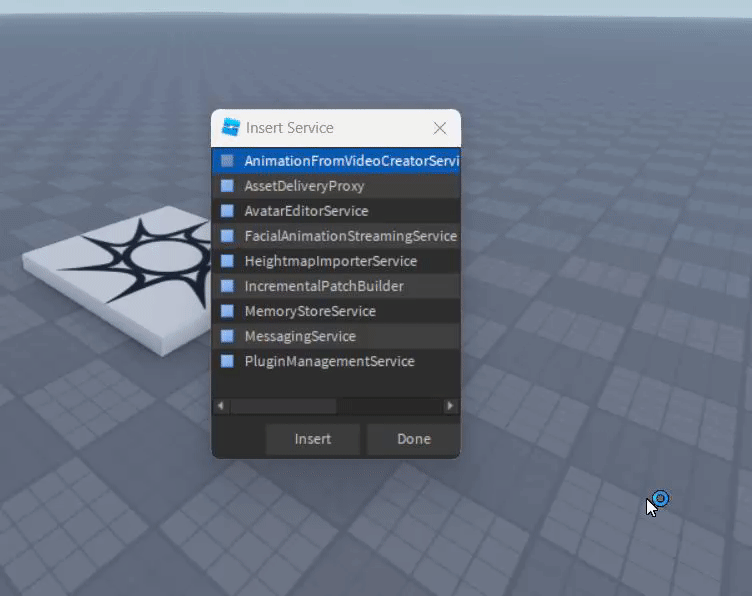
Once it’s sized up you can go ahead and click on “TextChatService”, once we’ve done this click on insert.
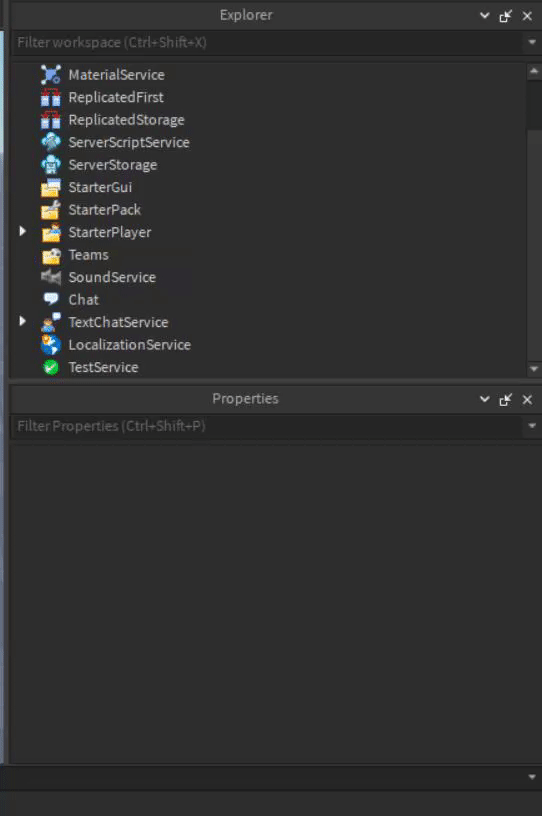
Finally, we need to swap from the LegacyChat to the new TextChatservice. Look for TextChatService in explorer then change the Version from LegacyChat to TextChatService.
![]() You’ve now set up your TextChatService, you may now change anything of your choice!
You’ve now set up your TextChatService, you may now change anything of your choice!
Configure Chat Window
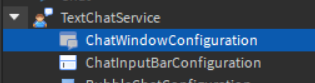
When we inserted the TextChatService it inserted 3 objects into TextChatservice, in this category we’re going to focus on just 2 of them, ChatWindowConfiguration & the ChatInputBarConfiguration.
Right now, these are a bit limited, however, we can enable and disable them, this allows us to hide the input bar to mute somebody if we wish to do so.

Customize Message Appearance
Right now, chat bubbles are the pretty plane, luckily, we can spice them up and make them look amazing. personally I ![]() these dark-themed chat bubbles!
these dark-themed chat bubbles!

When we inserted the TextChatService it inserted an object called “BubbleChatConfiguration”.
![]()
This object has many properties we can mess around with to produce a picture of our choice, take a look!

BackgroundColor3 - Background Colour of your bubble
TextColor3 - Text Colour of your bubble
TextSize - Size of text inside your bubble
BubbleDuration - How long do you want the bubble to stay up
BubbleSpacing - Space between each bubble
Enabled - If bubble chat is enabled or disabled, (Enabled by default)
LocalPlayerStudsOffset - Where bubble will spawn.
MaxDistance - How far can you see the bubble from

With these properties we can get green bubbles with big text, this is what they look like!
![]() Nice, you’ve now completed the bubble chat configuration guide!
Nice, you’ve now completed the bubble chat configuration guide!
Chat tags
Chat tags are a way to mark the significance of your name. Here is an example of a chat tag in-game!
![]()
Chat tags have all use cases, but in this scenario, we’re going to be making a VIP tag.
Copy this base code:
local TextChatService = game:GetService("TextChatService")
local Players = game:GetService("Players")

TextChatService.OnIncomingMessage = function(message: TextChatMessage)
	local properties = Instance.new("TextChatMessageProperties")

	if message.TextSource then
		local player = message.TextSource
		if player.Name == "YourPlayerName" then
			properties.PrefixText = "<font color='YourColor'>YourTag</font> " .. message.PrefixText
		end
	end

	return properties
end
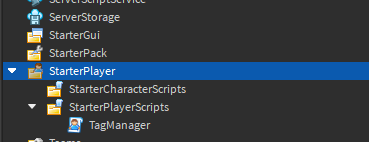
Make a local script and insert it in StarterPlayerScripts, give it a name of your choice! This script works by importing the players and TextChat service, when the TextChat service notices an incoming message, it gets the message. Following this, it creates a new TextChatMessageProperties, which creates new properties that we can alter, something such as a prefix text.
Our script next checks if there is a message, and then it gets the player, if the player matches a name it sets the prefix text.
To get the script working, replace YourPlayerName, with your username, mine would be Cookie_DevX. Next, we need to pick a colour for your tag, we need to supply this in an HTML value. We can use this HTML colour picker to our advantage.
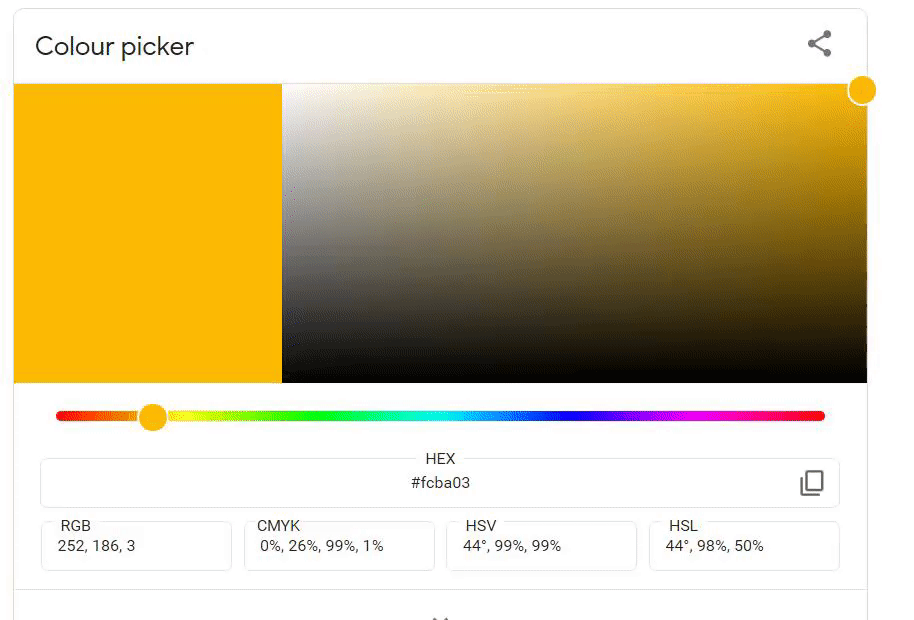
Once you’ve got the colour copy the Hex value. Keep it handy, the one I selected was: #fcc428
Where it says “your colour” paste your colour, For example:
properties.PrefixText = "<font color='#fcc428'>YourTag</font> " .. message.PrefixText
To set your tag name replace “YourTag” with a tag, for example: “VIP”, example:
properties.PrefixText = "<font color='#fcc428'>VIP</font> " .. message.PrefixText
An end script should look something like this
local TextChatService = game:GetService("TextChatService")
local Players = game:GetService("Players")

TextChatService.OnIncomingMessage = function(message: TextChatMessage)
	local properties = Instance.new("TextChatMessageProperties")

	if message.TextSource then
		local player = message.TextSource
		if player.Name == "Cookie_DevX" then
			properties.PrefixText = "<font color='#fcc428'>VIP</font> " .. message.PrefixText
		end
	end

	return properties
end
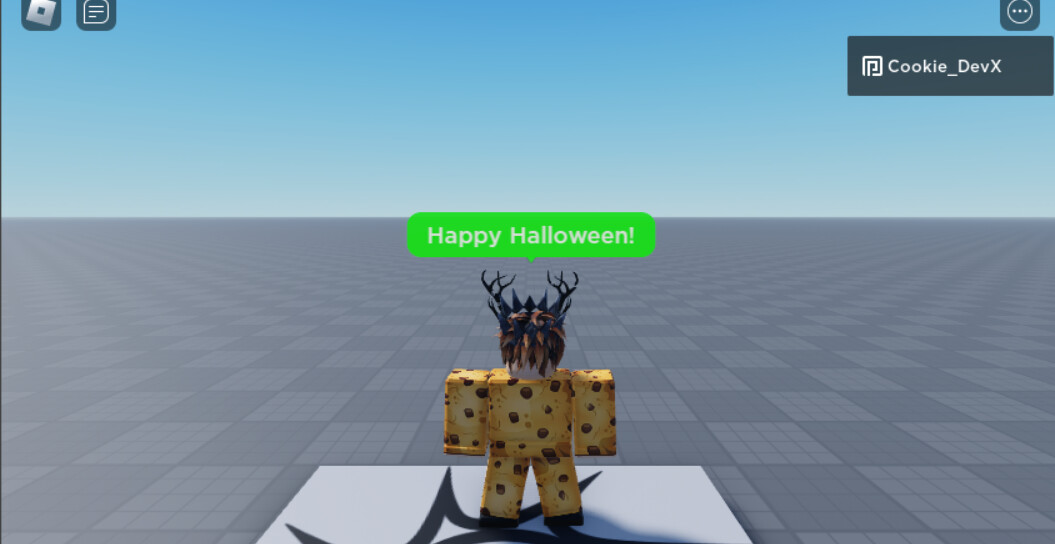
This was my result:
![]()
![]() Congratulations! You now have a custom chat tag!
Congratulations! You now have a custom chat tag!
Change Colour Of Usernames
This is simple to do, use the template below:
local TextChatService = game:GetService("TextChatService")
local Players = game:GetService("Players")

TextChatService.OnIncomingMessage = function(message: TextChatMessage)
	local properties = Instance.new("TextChatMessageProperties")

	if message.TextSource then
		local player = message.TextSource
		if player.Name == "YourName" then
			properties.PrefixText = string.format("<font color='YourColor'>%s</font>", message.PrefixText)
		end
	end

	return properties
end
This script does everything that the previous script does. However, instead, it replaces the colour of your username.
To get started replace “YourName” with your name. For example, I’ll do the “Cookie_DevX”, example:
if player.Name == "Cookie_DevX" then
Once you’ve got the colour copy the Hex value. Keep it handy, the one I selected was: #fcc428
Where it says “your color” paste your colour, For example:
properties.PrefixText = string.format("<font color='`#fcc428'>%s</font>"
This is what an end script should look like:
local TextChatService = game:GetService("TextChatService")
local Players = game:GetService("Players")

TextChatService.OnIncomingMessage = function(message: TextChatMessage)
	local properties = Instance.new("TextChatMessageProperties")

	if message.TextSource then
		local player = message.TextSource
		if player.Name == "Cookie_DevX" then
			properties.PrefixText = string.format("<font color='#fcc428'>%s</font>", message.PrefixText)
		end
	end

	return properties
end
This is the result I got:
![]()
![]() Great, you now have a working custom colour username!
Great, you now have a working custom colour username!
Goodbye 
I hope you enjoyed this tutorial; this is a wiki so feel free to edit away! ![]()
Thanks for reading,